Bot Management (Cloudflare)
Introduction
Section titled “Introduction”TestCLIX is a friendly bot designed to simulate user behavior on your site for monitoring purposes. However, many website-owners implement bot detection systems - such as Cloudflare - to protect against malicious bots lurking online. It is crucial to safeguard your site from harmful actions, and these systems play a key role.
While TestCLIX is a helpful tool, it might be mistaken for a bot you would want to block. That is why you might need to configure exceptions in your bot protection system - avoiding a cat-and-mouse game that is not productive. TestCLIX operates entirely under your control and generates only the traffic you explicitly configure.
In this guide, we show you how to configure TestCLIX using a custom header method. This approach is supported by Website Scenario, Website Availability, and Website Vitals.
We guide you step by step through integrating TestCLIX with bot management systems. We use Cloudflare as a reference implementation, but the same principles apply to most bot management solutions, even if their configuration layout differs.
Integration
Section titled “Integration”TestCLIX Configuration
Section titled “TestCLIX Configuration”For all test types - Website Scenario, Website Availability, and Website Vitals - the steps are the same:
-
Navigate to Workspace using the left sidebar menu.
-
Click the Create button on the right side.
-
Select required test type.
-
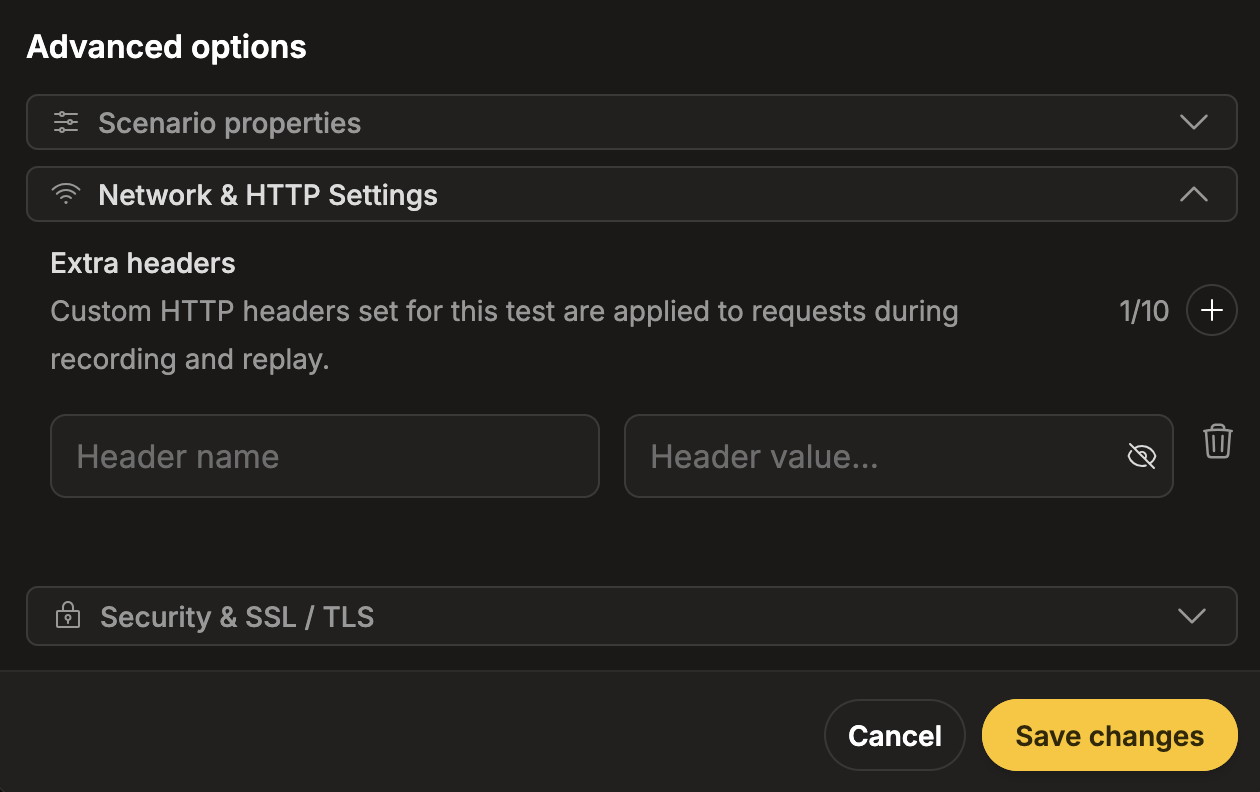
Click the + button next to the Extra headers field to add a new row for headers.
-
Provide the header name and value.
Both are arbitrary and can be chosen freely. The only requirement is that they exactly match the configuration in your external bot management system (such as Cloudflare). We recommend using a long, random, and hard-to-guess value for the header value.
-
Navigate to Workspace using the left sidebar menu.
-
Locate the test you want to modify.
-
Open the test settings using one of the following methods:
- On the overview page, click Edit next to the Options section.
- On any page, click the three-dot menu and select Edit scenario properties.
-
Click the + button next to the Extra headers field to add a new row for headers.
-
Provide the header name and value.
Both are arbitrary and can be chosen freely. The only requirement is that they exactly match the configuration in your external bot management system (such as Cloudflare). We recommend using a long, random, and hard-to-guess value for the header value.
For more details, please refer to the headers documentation for each test type:
Cloudflare Configuration
Section titled “Cloudflare Configuration”-
Log in to the Cloudflare account.
-
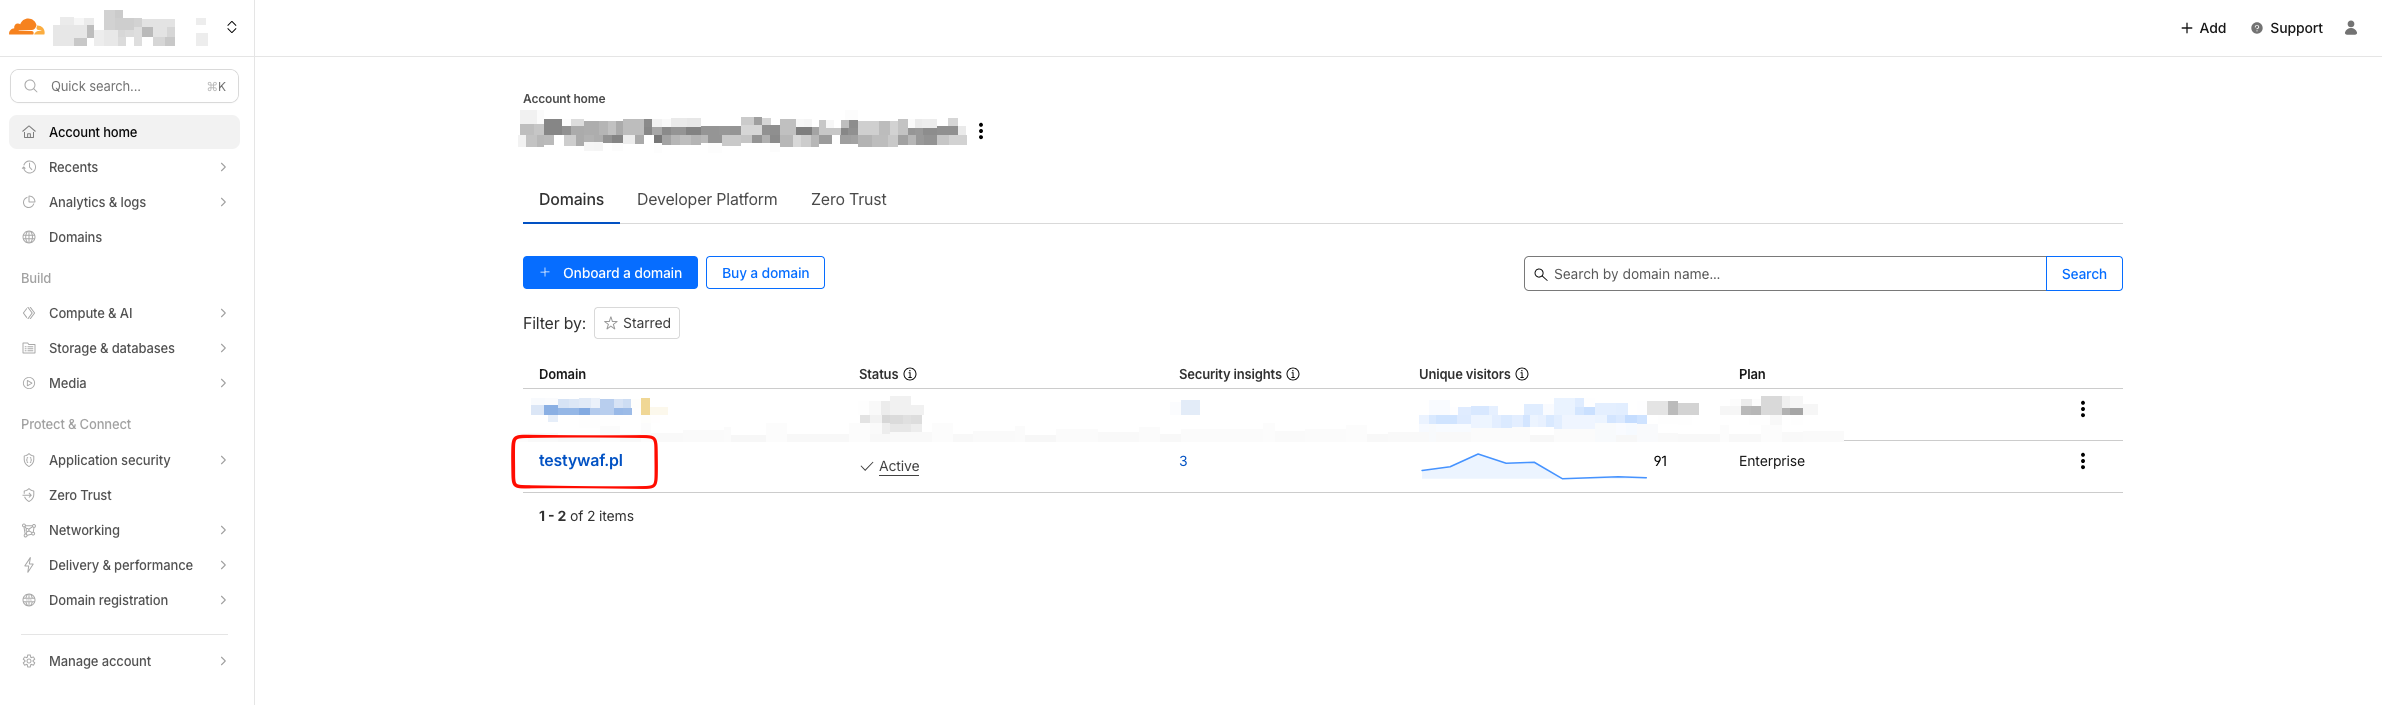
Select the domain for which HTTP traffic is being processed.
-
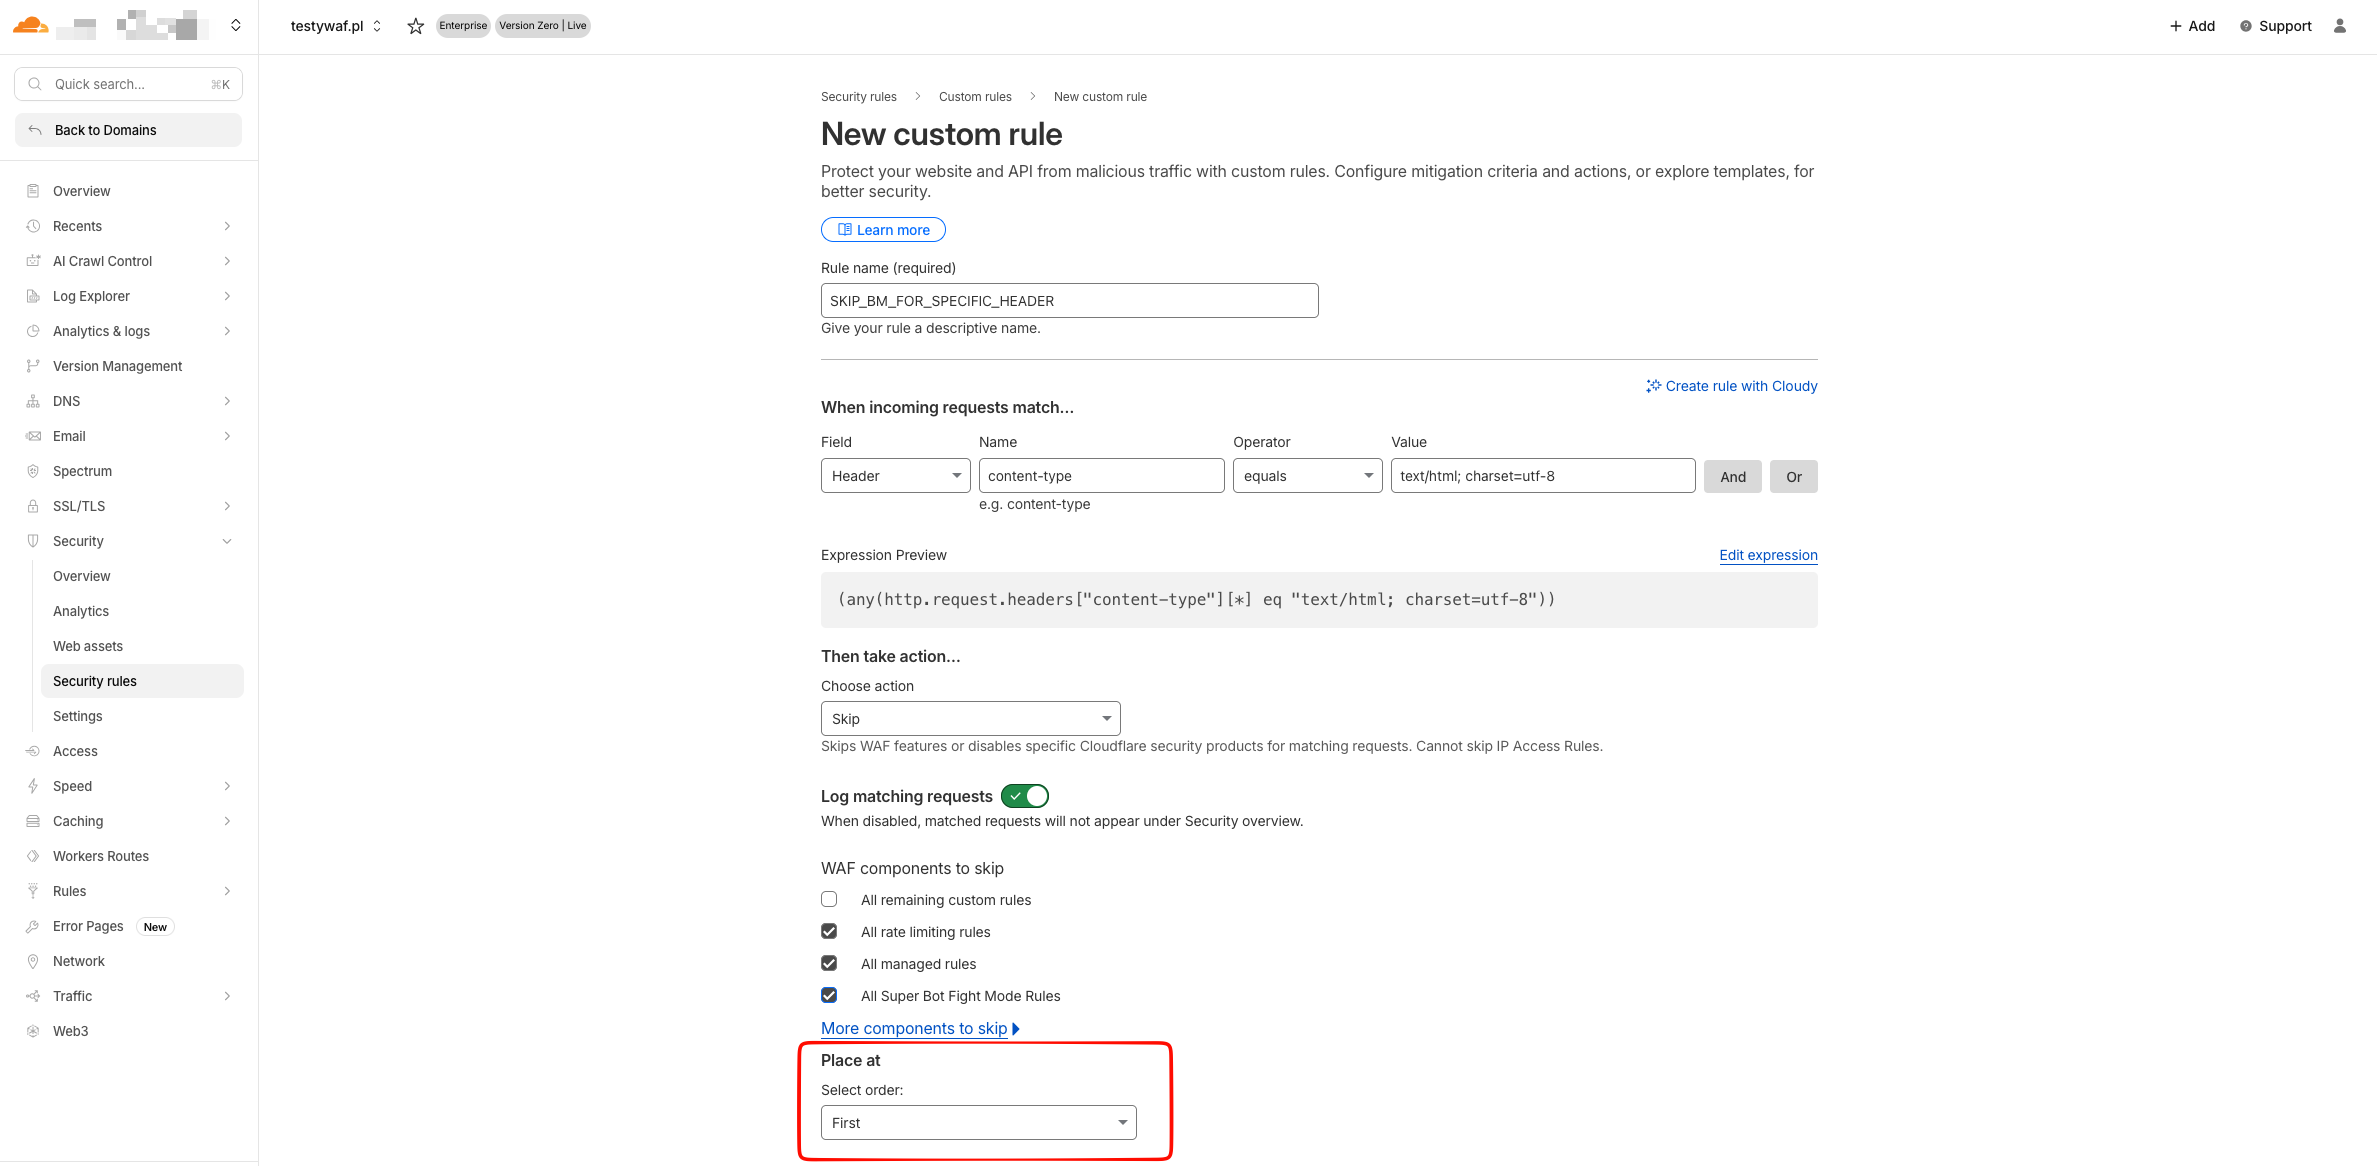
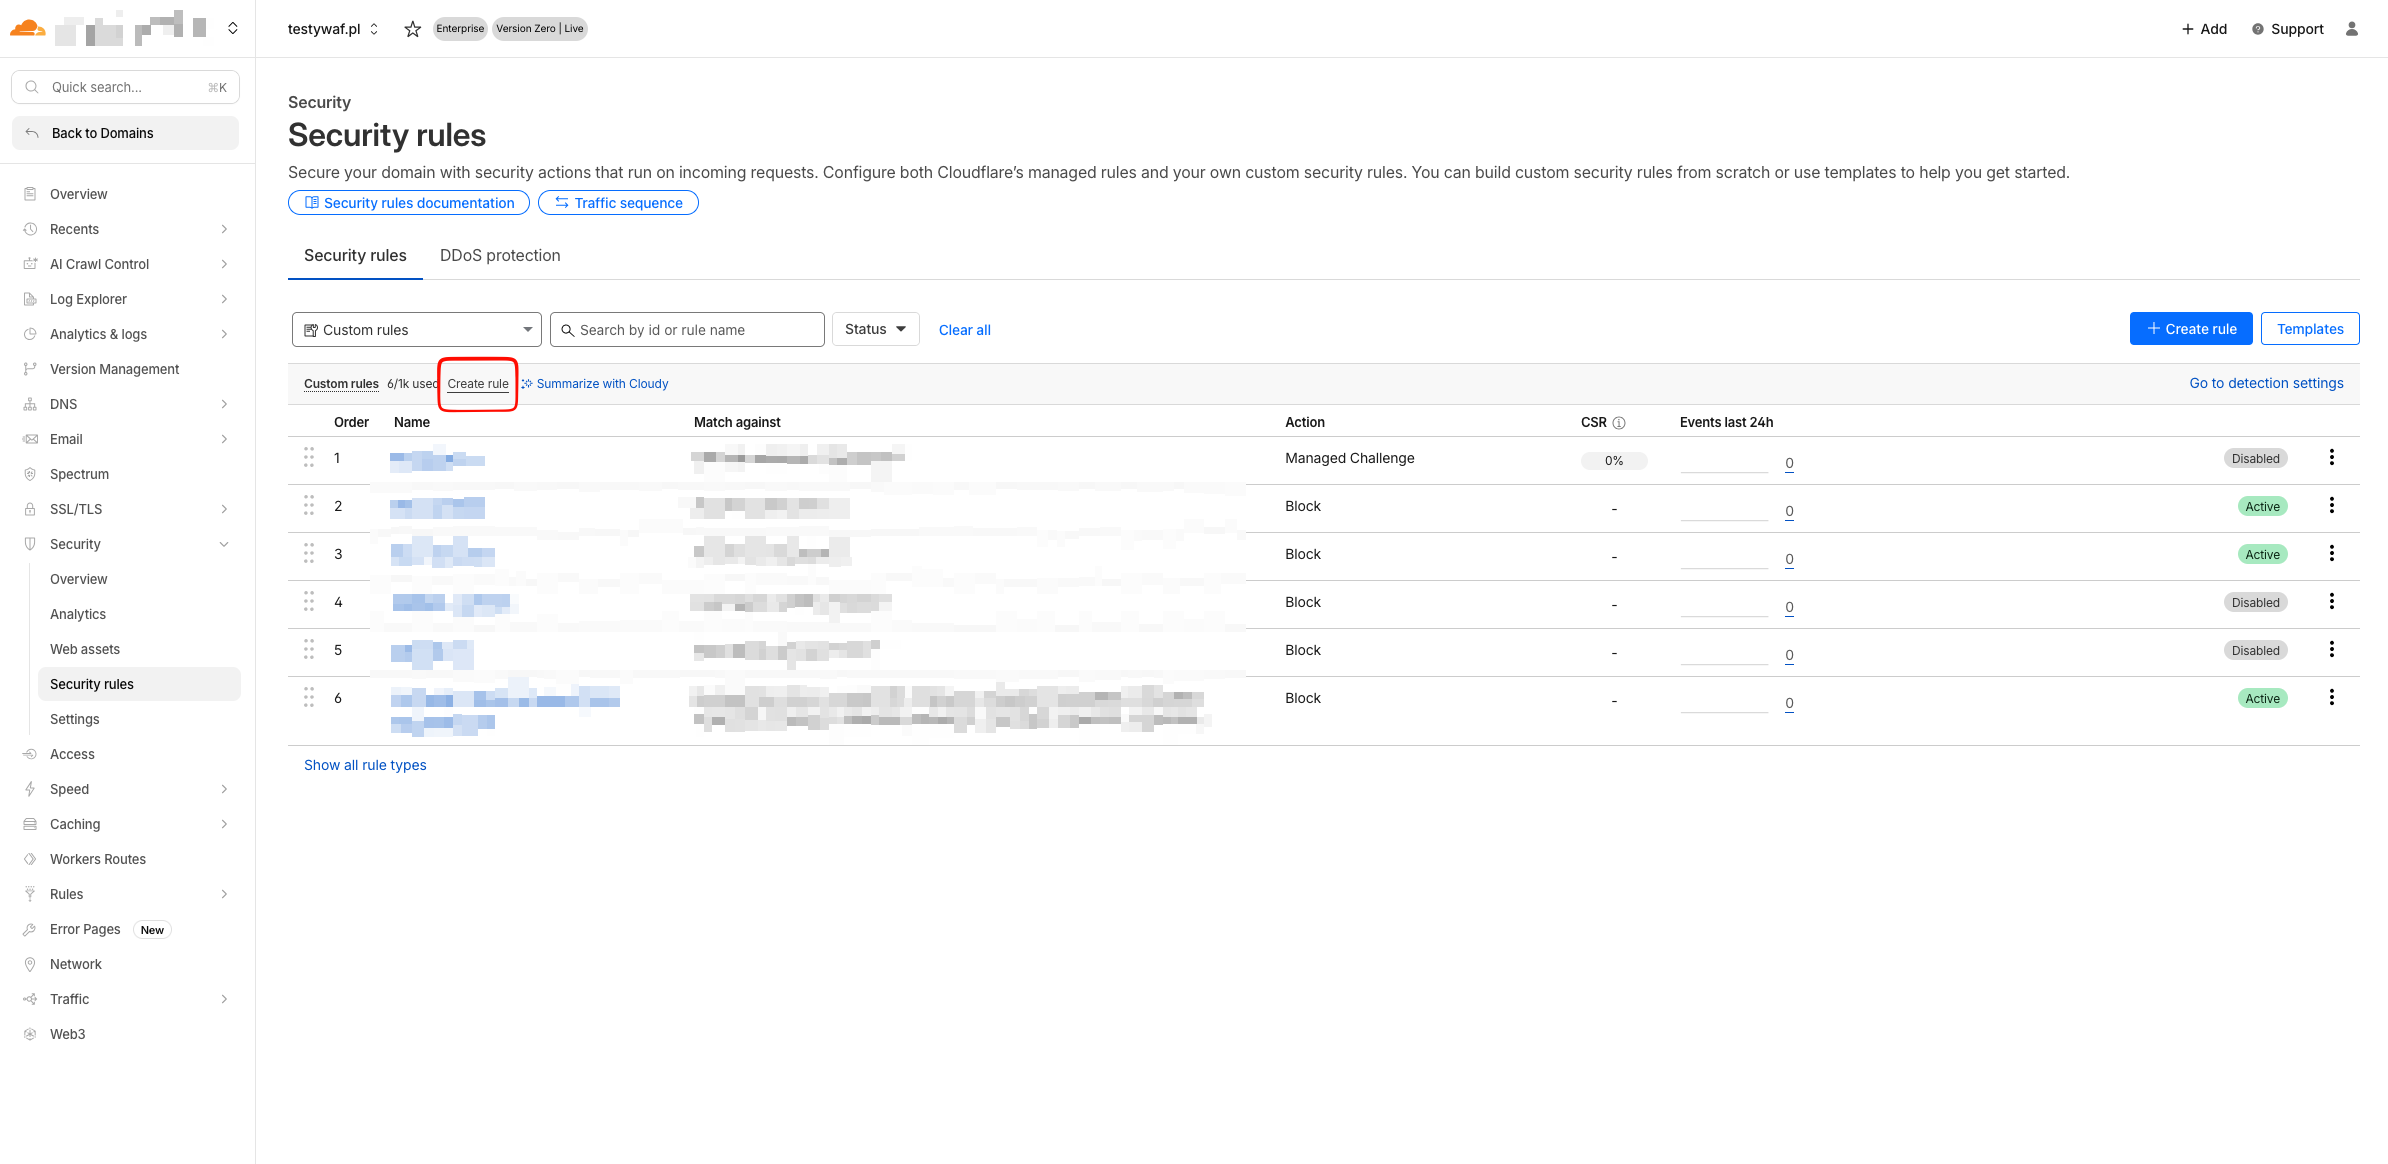
From the Security section in the navigation menu, open the list of security rules and start creating a new rule.
-
Assign a name to the new rule and define the criteria used to classify traffic.
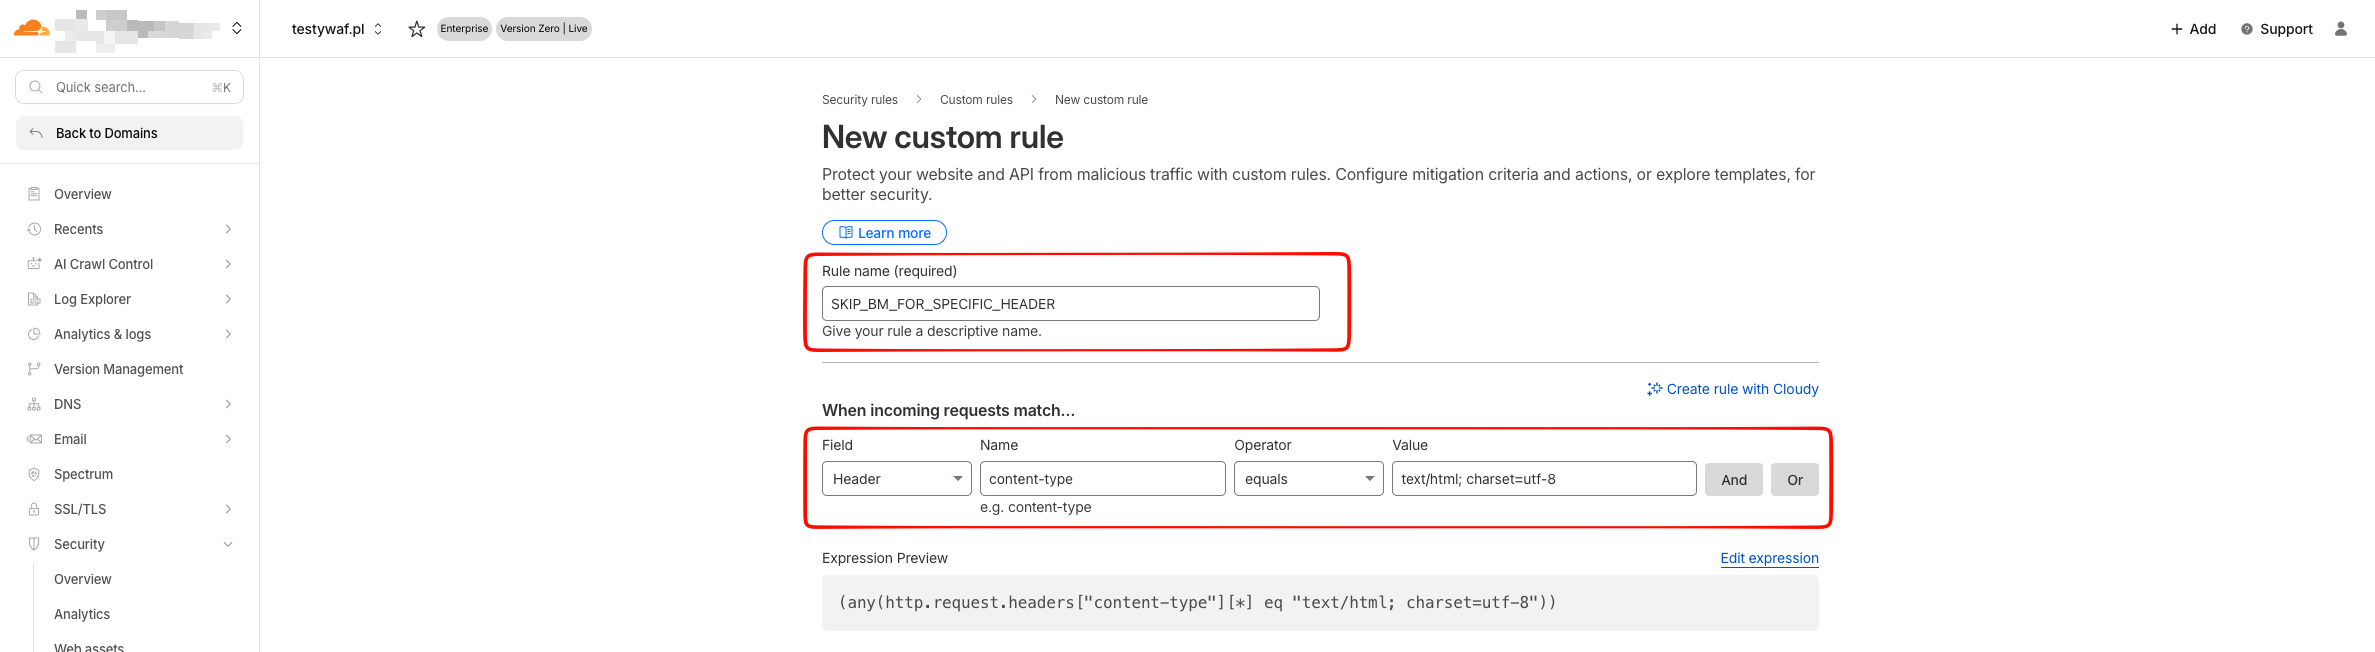
Example rule expression:
(any(http.request.headers["testclix-header"][*] eq "magic-value"))In this example, the rule matches traffic that contains a specific header named
testclix-headerwith a predefined value. This value must be the same in both TestCLIX and Cloudflare. We recommend using a random, long value for the header value. The name of the header does not matter as long as it is the same in both TestCLIX and Cloudflare. Both the header name and its value should be adapted to your own environment. -
Choose the action that the rule should perform.
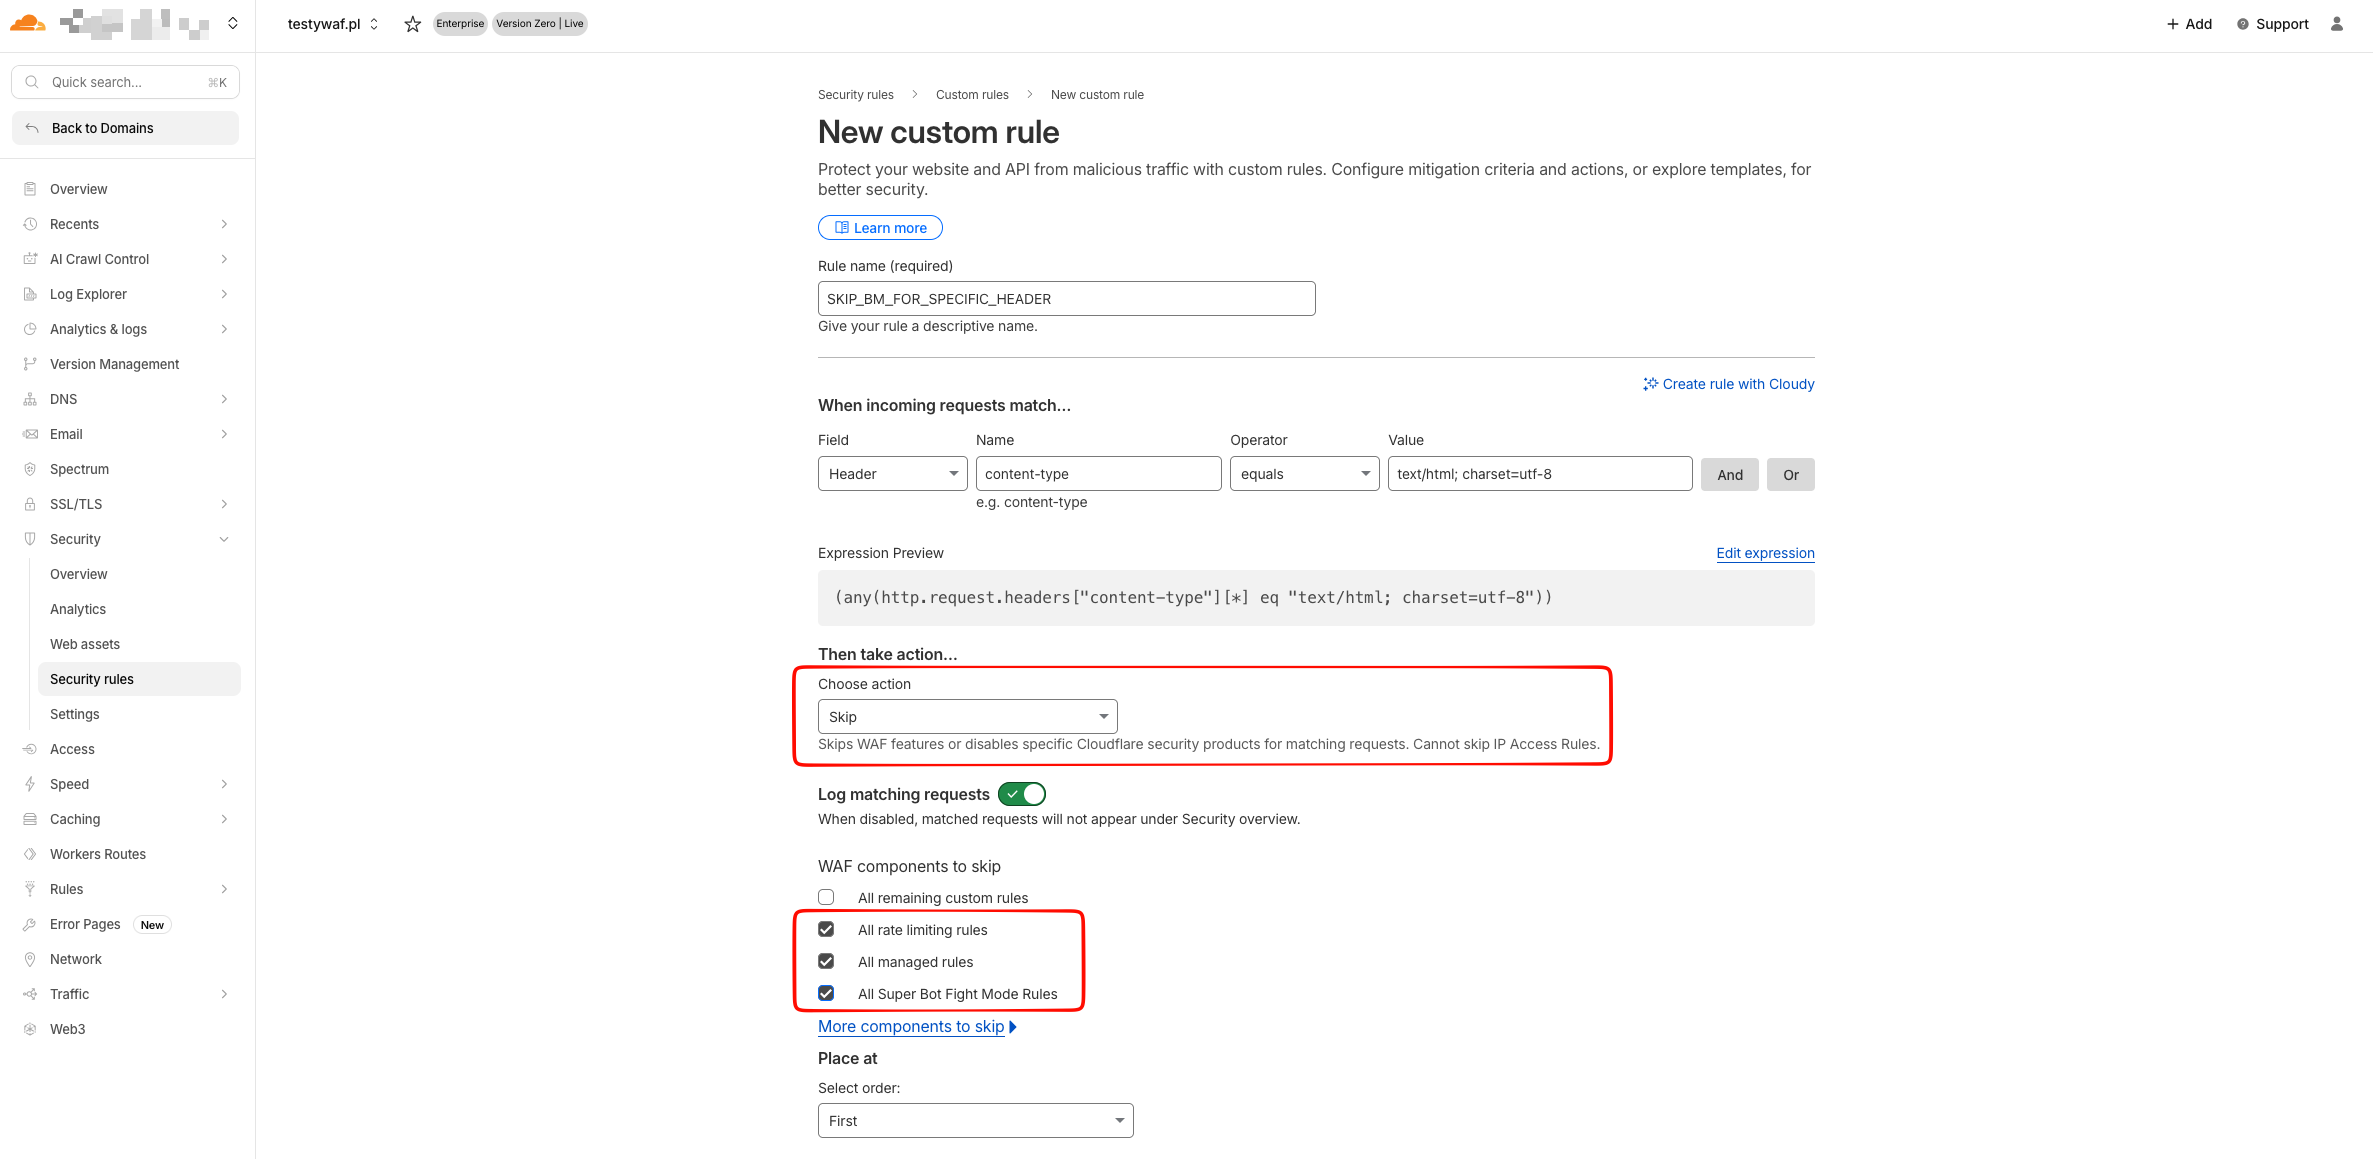
When selecting the Skip action, specify which modules should be skipped for this type of traffic.
To bypass traffic blocking by Bot Management and WAF rules, select the following options:
- All rate limiting rules
- All Managed rules
- All Super Bot Fight Mode Rules
-
Place the rule in the correct order relative to other rules. Incorrect rule ordering may result in unexpected behavior or interfere with other security rules.