
Users & Invitations
Introduction
Section titled “Introduction”Team access in TestCLIX is managed on the Users page. Only Admins and Owners can invite users or change permissions.
Open Users from the left sidebar menu. The page contains two tabs:
| Tab | Description |
|---|---|
| Users | List of everyone who has joined the project |
| Invitations | Pending invitations not yet accepted |
The Project overview panel on the left shows the project name, its ID, and your own permissions. In the Users tab, each member row shows the Email (your own row is marked with (you)), Access badges with the assigned role, and an Actions menu. Expand a row to see who invited that member and when they joined.
For a detailed breakdown of what each role can do, see Roles & Permissions.
Inviting a User
Section titled “Inviting a User”-
Open Users from the left sidebar menu.
-
Click the Invite user button (user-plus icon) in the top-right corner.
-
In the Invite user dialog:
- Enter the person’s email address
- Select a role: Owner, Admin, Editor, Viewer, or Accountant
- Optionally enable Billing for Admin, Editor, or Viewer
- Click View details on a role card to see what that role includes
-
Click Send invitation.
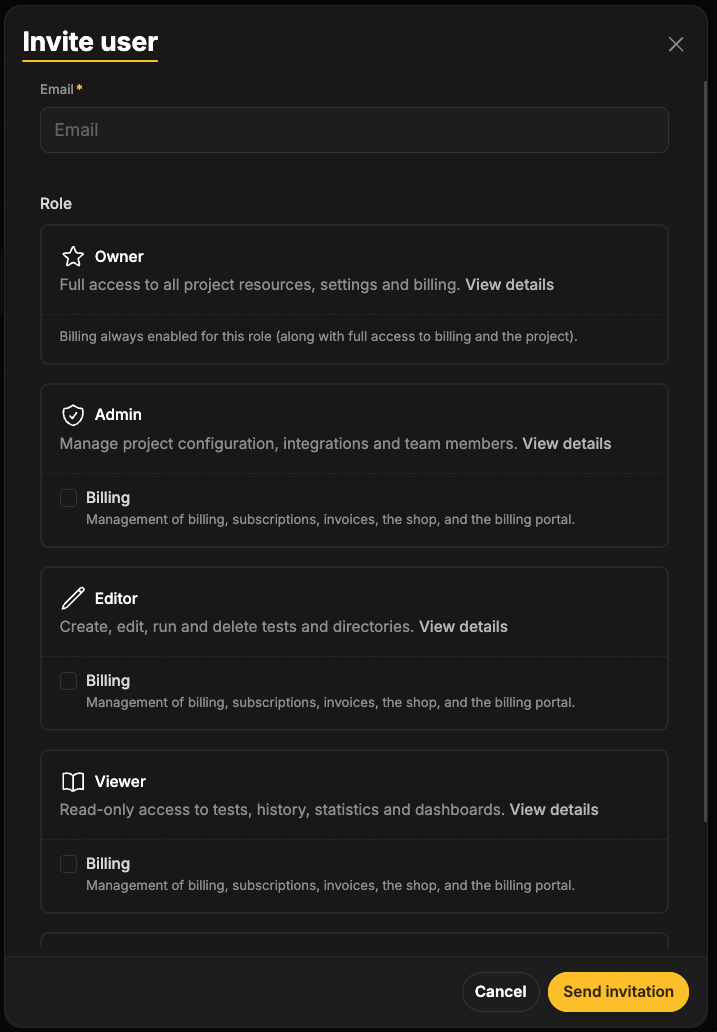
The invited person receives an email with a link to join the project.
Invitation Rules
Section titled “Invitation Rules”| Rule | Details |
|---|---|
| Expiry | Invitations expire after 7 days |
| One per email | An email address can have only one pending invitation per project |
| Existing members | You cannot invite someone who is already a project member |
| Email-bound | The invitation can only be accepted by the exact email address it was sent to |
| Owner role | Only an existing Owner can invite someone as Owner |
Adding Billing Permission When Inviting
Section titled “Adding Billing Permission When Inviting”| Role selected | Billing option |
|---|---|
| Owner | Always included |
| Accountant | Always included |
| Admin, Editor, Viewer | Optional - check Billing to also grant shop, invoices, and subscription access |
Managing Pending Invitations
Section titled “Managing Pending Invitations”-
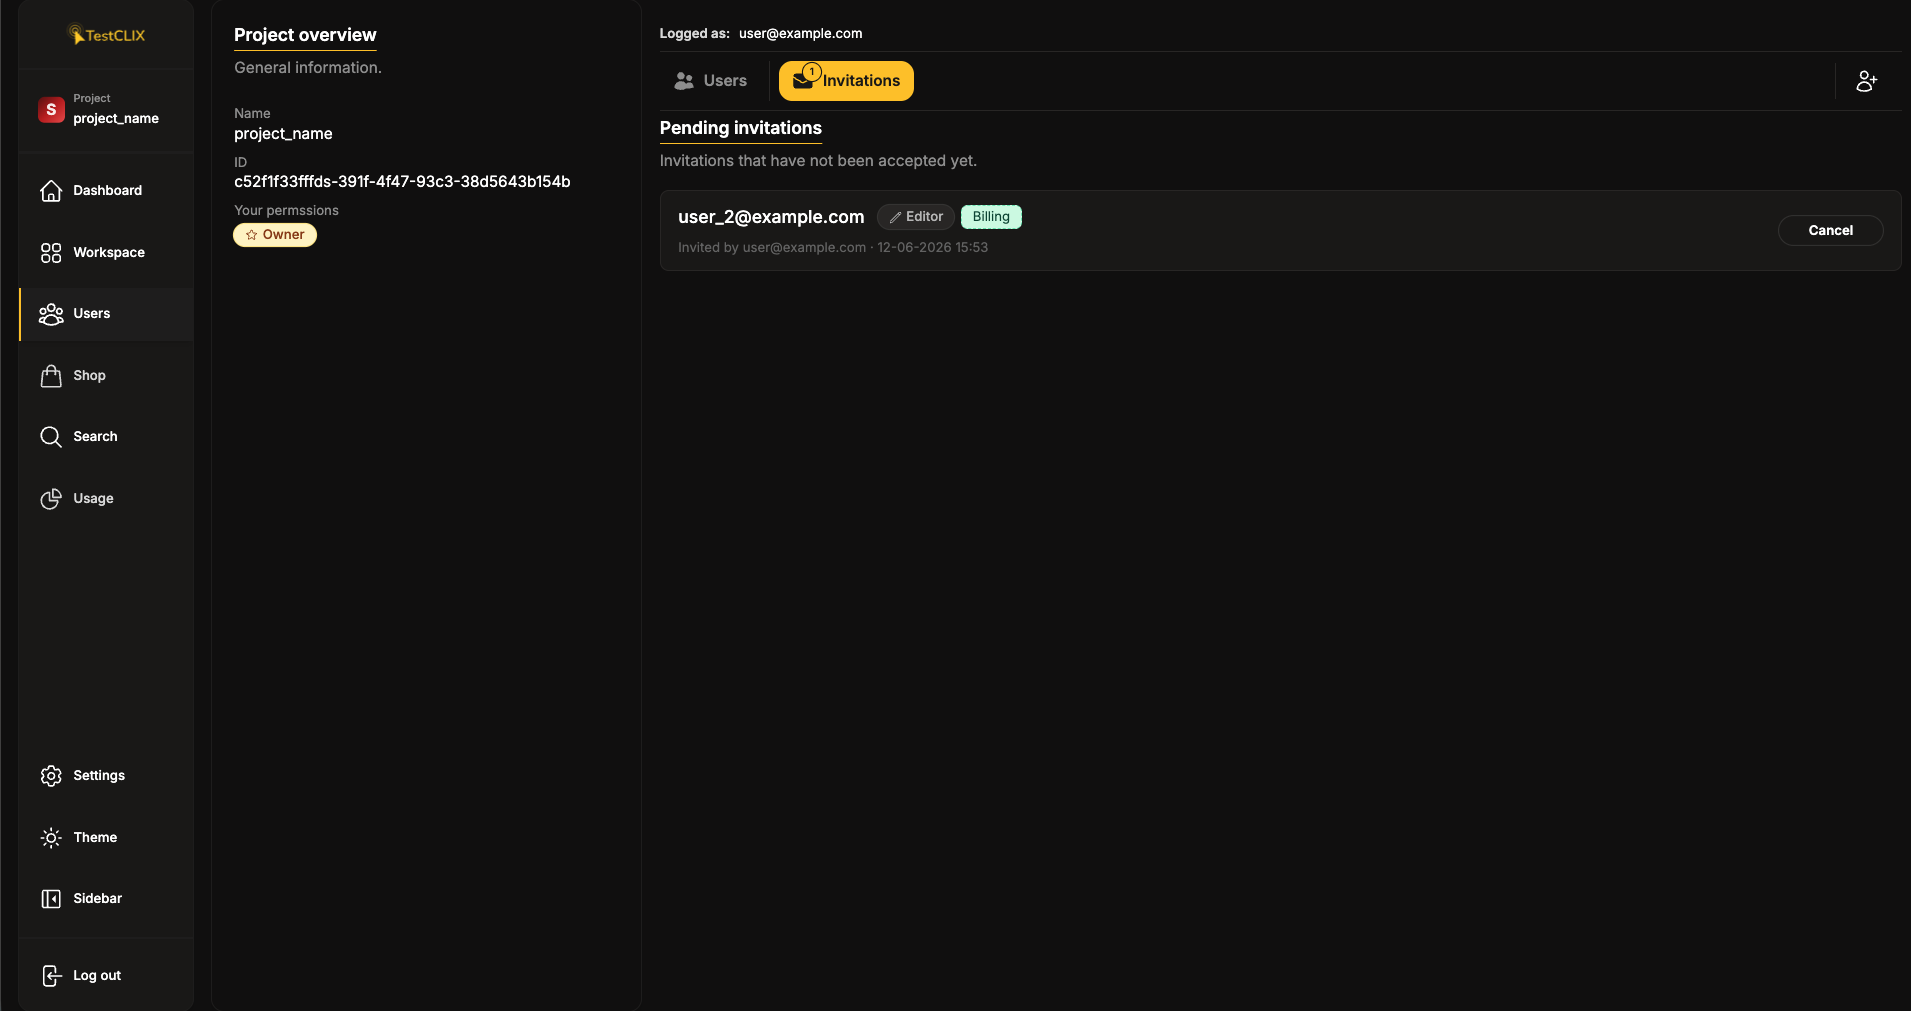
Open Users from the left sidebar menu and go to the Invitations tab.
-
Each pending invitation shows:
- Email address
- Assigned role (and Billing if applicable)
- Who sent the invitation and when
-
Click Cancel to withdraw an invitation before it is accepted.
The Invitations tab shows a badge when invitations are pending.
Accepting an Invitation
Section titled “Accepting an Invitation”If you receive a project invitation:
-
Open the link from the invitation email.
-
If you are not signed in, click Sign in to accept and log in with the invited email. After signing in, you are returned to the invitation page.
-
Review the project name and who invited you.
-
Click Accept invitation. You are taken to the project’s Dashboard automatically.
If You Don’t Have an Account Yet
Section titled “If You Don’t Have an Account Yet”You can be invited before creating a TestCLIX account. In that case:
-
From the sign-in page, use Register now to create an account with the invited email address.
-
Confirm your account.
-
Open the invitation link from the email again and click Accept invitation.
Editing Permissions
Section titled “Editing Permissions”-
Open Users from the left sidebar menu and go to the Users tab.
-
Find the user in the table.
-
Click the Actions menu (three dots) on their row.
-
Select Edit.
-
In the Edit role dialog:
- The email field is read-only
- Select a new role
- Adjust the Billing checkbox if applicable
-
Click Update.
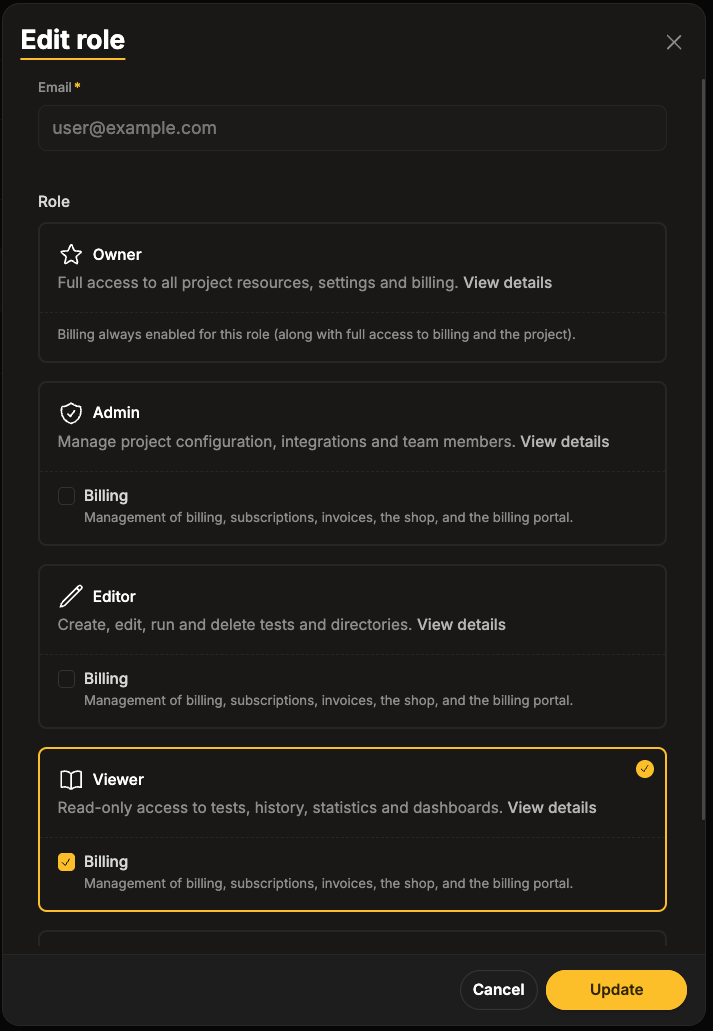
Changes take effect immediately. If you edit your own role, the page reloads to apply the new permissions.
Restrictions When Editing
Section titled “Restrictions When Editing”| Situation | What happens |
|---|---|
| You are Admin (not Owner) | You cannot assign the Owner role |
| You are the only Owner | You cannot edit or remove yourself as Owner |
| You are Admin editing an Owner | Edit is blocked |
| You want to remove yourself | Use Leave project in Settings → Project, not Delete member |
Transferring Ownership
Section titled “Transferring Ownership”There is no separate transfer flow - ownership is handed over by editing roles:
-
As an Owner, edit the permissions of the member who should take over and assign them the Owner role.
-
Once the project has more than one Owner, you can change your own role to something lower, or leave the project.
Removing a User
Section titled “Removing a User”-
Open Users from the left sidebar menu and go to the Users tab.
-
Open the Actions menu (three dots) for that user.
-
Select Delete member.
-
Confirm in the dialog.
Removing another Admin or an Owner requires the Owner role.
The person I invited never received the email. What should I do?
Ask them to check their spam folder. If the email is missing, go to the Invitations tab, Cancel the pending invitation, and send a new one.
Can I change the role on a pending invitation?
No. Cancel the invitation and send a new one with the correct role.
How long is an invitation valid?
7 days. After that, the link shows Invitation unavailable and a new invitation must be sent.
Why can’t I assign the Owner role?
Only an existing Owner can promote another user to Owner.