Extra headers
Introduction
Section titled “Introduction”TestCLIX lets you configure custom HTTP headers per test. These headers are attached to requests generated during each check.
This is useful when you want to:
- identify TestCLIX traffic in your analytics and filter it out from user reports
- allow monitoring traffic through bot protection systems
- pass internal routing or environment flags required by your infrastructure
If you use Cloudflare or a similar solution, see Bot Management Integration.
How It Works
Section titled “How It Works”During test configuration, you can add up to 10 extra headers. Each configured header is sent with HTTP requests generated by the test.
Headers are applied in browser navigation/request context, so observed behavior can differ from raw HTTP checks because JavaScript, asset loading, and browser policies are involved.
Header names and values are fully customizable.
Authorization headers are supported and can be used for endpoints that require authentication.
You can also use headers like Accept-Language to test localized responses for different language preferences.
Configuration
Section titled “Configuration”-
Navigate to Workspace using the left sidebar menu.
-
Click the Create button on the right side.
-
Select Website Vitals.
-
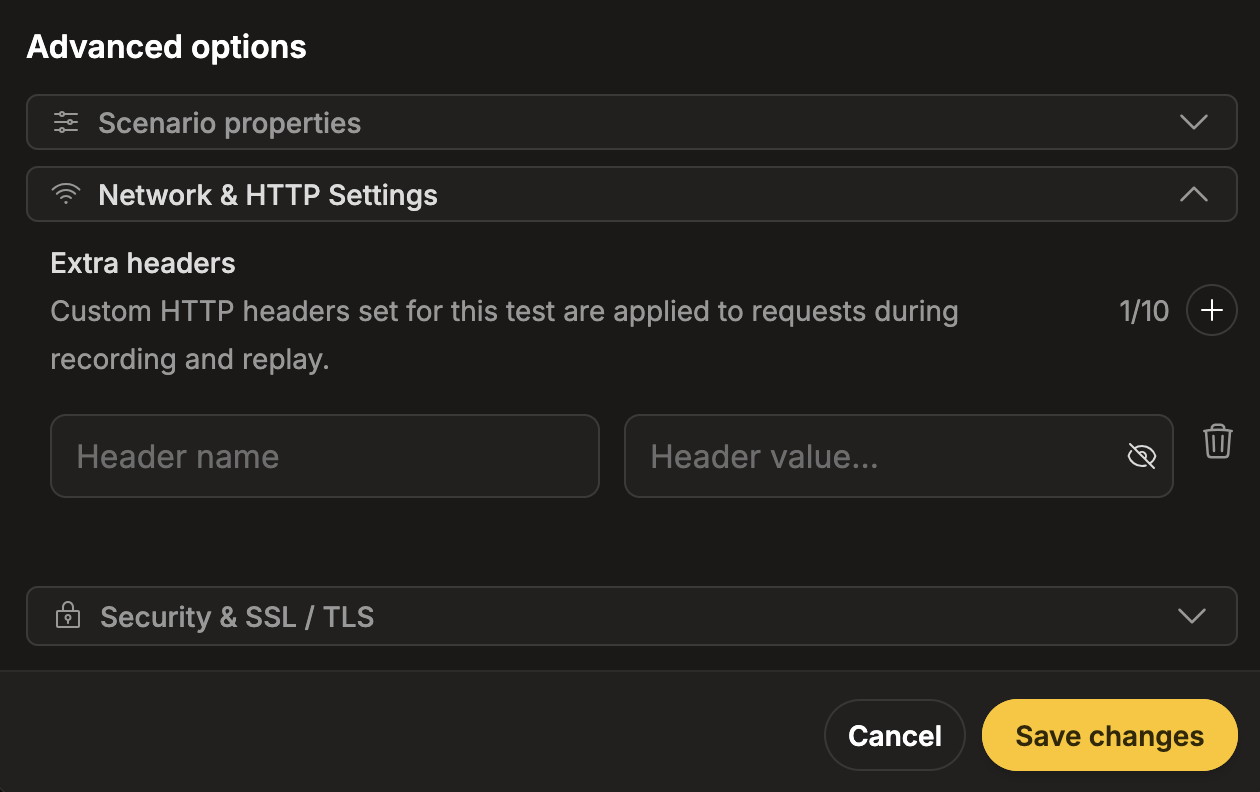
Scroll down to the Advanced options section.
-
Expand the Network & HTTP Settings subsection.
-
Click the + button next to the Extra headers field to add a new header row.
-
Provide the header name and value.
Both can be chosen freely. If you use bot management or firewall rules, values must exactly match your external configuration (for example, in Cloudflare). We recommend using a long, random, and hard-to-guess value.
-
Navigate to Workspace using the left sidebar menu.
-
Locate the test you want to modify.
-
Open the test settings using one of the following methods:
- On the overview page, click Edit next to the Options section.
- On any page, click the three-dot menu and select Edit test properties.
-
Scroll down to the Advanced options section.
-
Expand the Network & HTTP Settings subsection.
-
Click the + button next to the Extra headers field to add a new header row.
-
Provide the header name and value.
Both can be chosen freely. If you use bot management or firewall rules, values must exactly match your external configuration (for example, in Cloudflare). We recommend using a long, random, and hard-to-guess value.