
Project Management
Introduction
Section titled “Introduction”Everything in TestCLIX happens inside a project. Tests, results, schedules, integrations, team members, and billing are all scoped to the project you are currently working in.
A project brings together:
- Workspace - directories, tests, and their results
- Team - members, their roles, and pending invitations
- Integrations - Slack, Telegram, Jira, webhooks, email notifications, and the project API key
- Billing - subscription, invoices, and purchases
You can be a member of multiple projects, and your role may be different in each one. See Roles & Permissions for what each role can do.
This guide explains:
- How projects are created and switched
- How to rename a project
- How to leave a project
Your First Project
Section titled “Your First Project”When you sign up, TestCLIX automatically creates a personal workspace project for you, named after your email address (for example, john workspace). You are the Owner of this project and can rename it at any time.
If you were invited to an existing project instead, see Accepting an Invitation.
Creating a Project
Section titled “Creating a Project”-
Click Project at the top of the left sidebar.
-
In the Select project dialog, click Create project.
-
Enter a Project name (up to 64 characters).
-
Click Create.
You become the new project’s Owner. The project appears in your project list - switch to it from the Select project dialog. If it is your only project, it is selected automatically.
Switching Projects
Section titled “Switching Projects”-
Click Project at the top of the left sidebar. The currently selected project is shown beneath the label.
-
In the Select project dialog, use Search projects or browse the All projects list. Each entry shows the project name and a shortened Project ID - search matches both, which helps when projects share similar names.
-
Click a project to switch to it. The application reloads and opens that project’s Dashboard.
A few things to know:
- If you are a member of only one project, it is selected automatically when you sign in.
- If you are a member of several projects, TestCLIX shows the Select project page after sign-in so you can pick one.
- If you have no projects at all (for example, after leaving your last one), the Select project page shows an empty state with a Create button, so you can always create your first project from there.
- Your role and available actions may change after switching, because permissions are assigned per project.
Renaming a Project
Section titled “Renaming a Project”Renaming requires the Owner role.
-
Open Settings from the left sidebar menu and go to the Project tab.
-
In the Project data section, edit the Project name field (up to 64 characters).
-
Click Update.
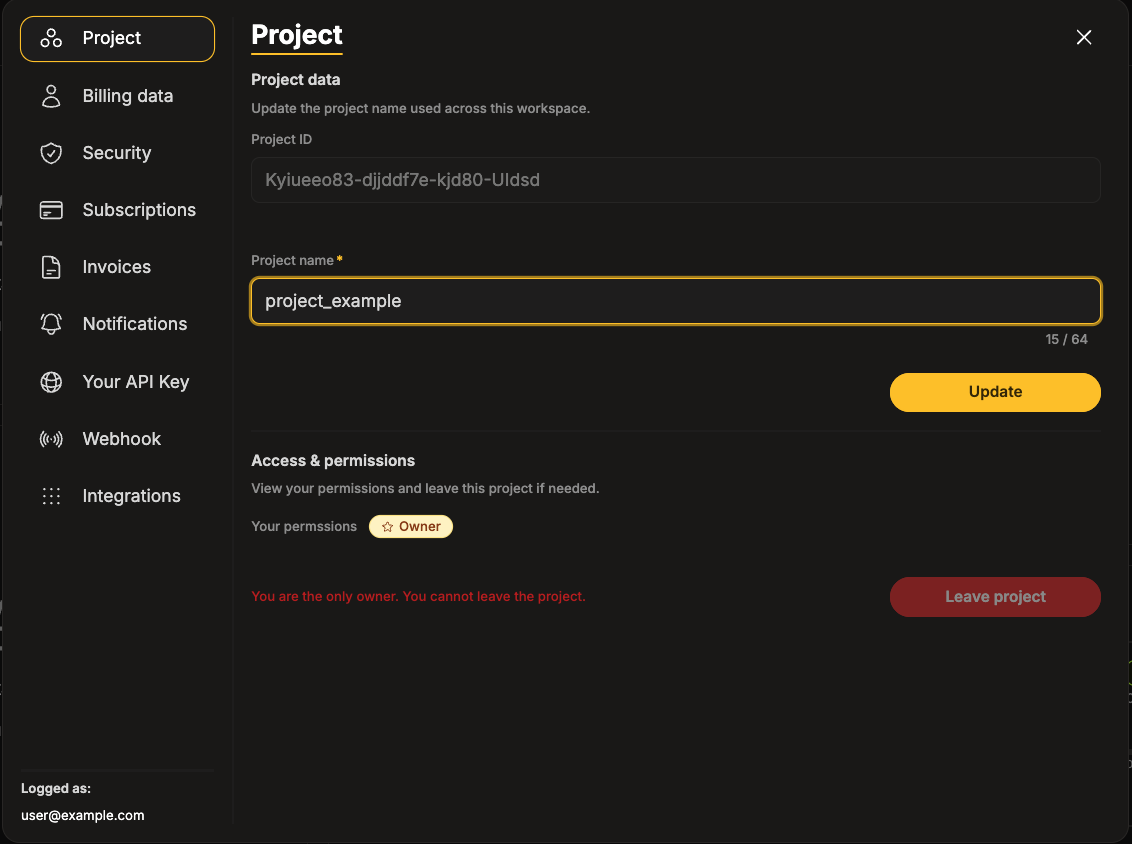
The Project ID shown above the name is read-only and identifies the project internally.
Leaving a Project
Section titled “Leaving a Project”Any member can leave a project, with one exception: the only Owner cannot leave.
-
Open Settings from the left sidebar menu and go to the Project tab.
-
In the Access & permissions section, click Leave project.
-
Confirm in the dialog.
After leaving, you are redirected to the Select project page. To rejoin the project later, you need a new invitation.
Deleting a Project
Section titled “Deleting a Project”Deleting a project is not available from the portal. If you need a project removed, contact us at clix@testclix.com.
Managing Your Team
Section titled “Managing Your Team”I reached the project limit. How do I get more?
Contact us at clix@testclix.com and we will increase your limit.
Can I rejoin a project after leaving it?
Yes, but only through a new invitation from that project’s Admin or Owner.
Do my role and permissions carry over between projects?
No.
Permissions are assigned per project, so your role may change after switching projects.