Pixel Comparison
Introduction
Section titled “Introduction”One of the biggest challenges in e-business is the lack of tools that allow you to track visual changes on a website. Most utilities only check server response codes or verify that specific text appears on the page. While these checks are useful as early canaries, they do not cover all potential problems.
One such problem is whether users see your website as it was intended. This is where the real power of TestCLIX comes in. TestCLIX allows you to monitor even slight changes on your website, detecting unintentional modifications during normal operation or after an update. Thanks to this, you can quickly identify when something is not working correctly - not only on the server side, but also on the client side.
At TestCLIX, we provide a utility to verify that your users see exactly what they are supposed to see.
How It Works
Section titled “How It Works”In the Website Scenario, you can enable Full Screen Comparison on a test. During each test run, the platform compares the original session (the screenshot captured during test creation) with the current state of the website. To use this feature, you need to have a configured scheduler or run the test manually.
The utility detects changes on the website and reports them back. If a change is detected, the test is marked as Error.
However, some areas of a page might not be intended for monitoring. For example, a calendar widget, a news feed, rotating ad banners, or a live chat window may change dynamically between test runs. You might want to skip such zones and exclude them from the comparison. This is why we have introduced Ignored Zones - areas that are omitted during screen comparison, giving you full flexibility over what is monitored.
Configuration
Section titled “Configuration”Configuring Full Screen Comparison
Section titled “Configuring Full Screen Comparison”-
Navigate to Workspace using the left sidebar menu.
-
Click the Create button on the right side.
-
Select Web Scenario.
-
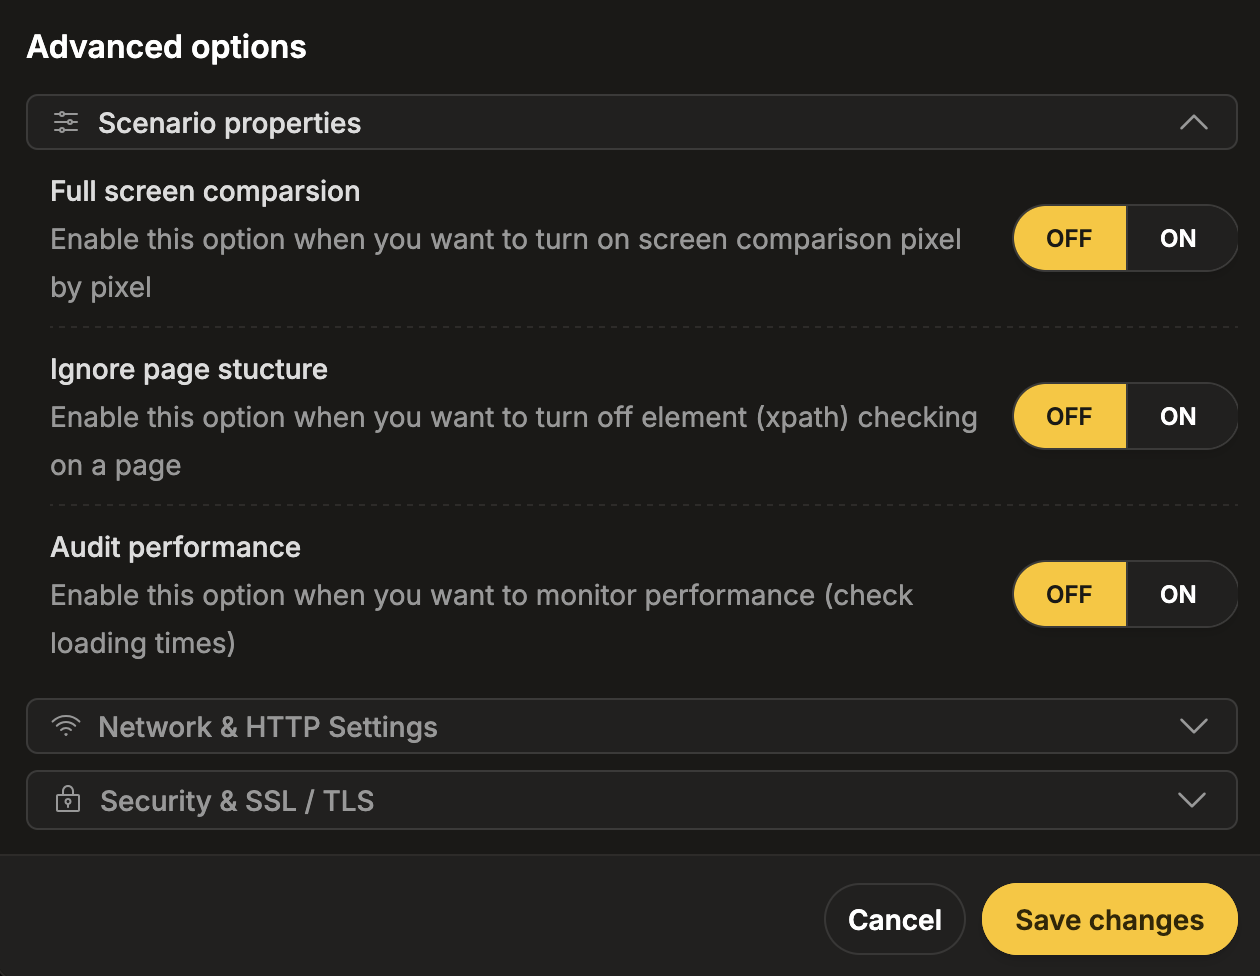
Scroll down to the Advanced options section.
-
Expand the Scenario properties subsection.
-
Enable the Full Screen Comparison toggle.
-
Navigate to Workspace using the left sidebar menu.
-
Locate the test you want to modify.
-
Open the test settings using one of the following methods:
- On the overview page, click Edit next to the Options section.
- On any page, click the three-dot menu and select Edit scenario properties.
-
Scroll down to the Advanced options section.
-
Expand the Scenario properties subsection.
-
Enable the Full Screen Comparison toggle.
Configuring Ignored Zones
Section titled “Configuring Ignored Zones”To configure Ignored Zones, you need to start the session recorder. You can do this either by creating a new test, filling in the entire configuration and selecting Save and record, or by finding the test you want to modify and selecting Modify scenario steps on the top bar.
To add Ignored Zones, you need to have some events on the scenario timeline. You can add Ignored Zones to any event, as all events are used in Full Screen Comparison.
-
Right-click on the event in the timeline where you want to add Ignored Zones.
-
This will bring you into preview mode. The main window will show the state of the website at the given step.

-
On the left side, the option to add Ignored Zones should appear.
-
Click the Ignore Zones button.
-
Click on the canvas to add rectangles indicating the zones that should be ignored.

-
The configured zones are interactive. You can grab them and move them, or use the corners to resize them.

-
On the left side, under Ignore Zones, you can remove zones that you no longer need.
-
After creating zones, select Save ignored zones to close the preview and save your changes.
-
Scenarios with configured Ignored Zones will display an additional indicator icon in the bottom right corner.

Reporting
Section titled “Reporting”If the test run ends in the Error state, you can audit it in the Session Player. Full Screen Comparison generates a special type of error that indicates which elements are different between the original session and the run under question. The elements that differ are additionally marked with a highlighted square.
The Error from the screen comparison is also indicated in the error message (in the history, timeline event, etc.) with the following text: Step XXX: Unable to execute step: The image check failed.